Kraken is a tool that optimizes images without sacrificing quality. And it’s pretty incredible. You almost can’t tell the difference. The results are saved bandwidth, storage space, and (of course) money. Check out the following high resolution image below and see if you can see any difference between the original and optimized images.
Before and After Kraken Optimizes Your Photo

Top
Below are two images. The one on the left there is the original, non compressed JPEG image at 72 ppi, 2509 x 1673 pixels, and 717 KB. The one on the right has been optimized using Kraken. Same pixel count, same dimensions, but only 324 KB. Less than half the size.

But let’s take a closer look at the post optimization quality with high definition.
The photograph below weighs in at a whopping 9.1 MB. After running it through Kraken (and compressing it down to roughly half the size), I placed them side by side. The optimized girl is on the right, and the original is on the left. Or is it the other way around…

Locating and Setting Up Kraken in WordPress
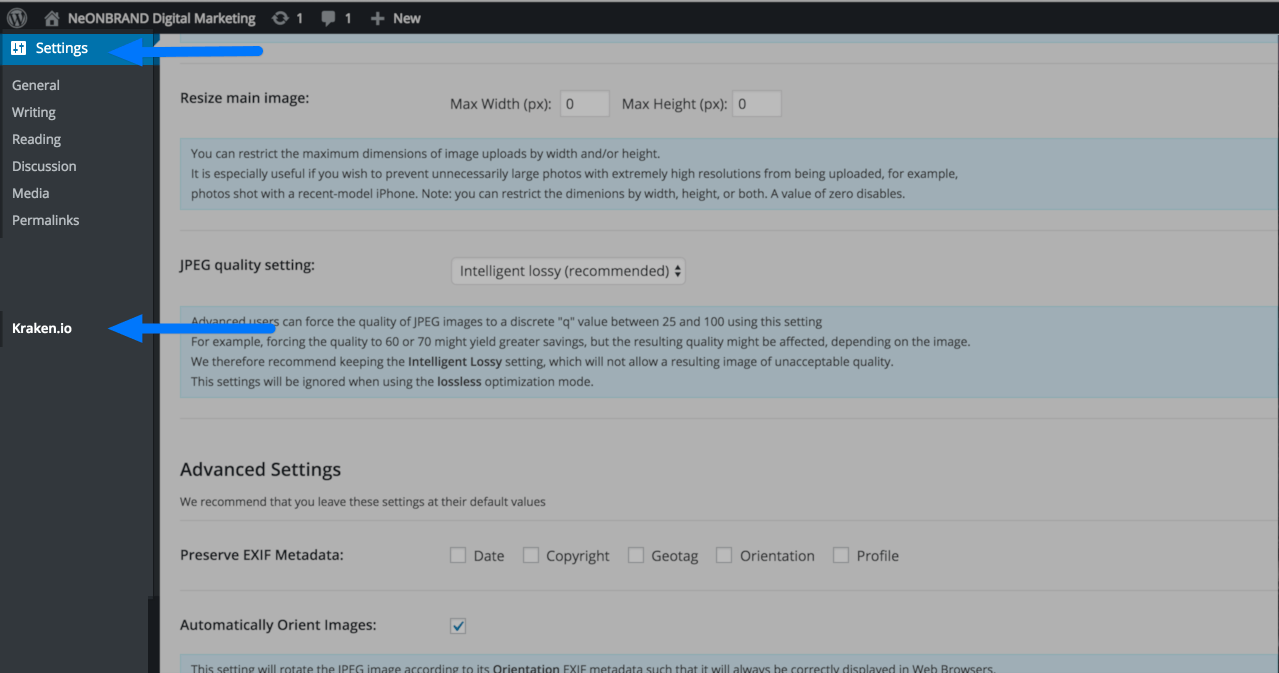
Once you’ve installed Kraken you’re probably wondering where it shows up on your dashboard. Look under Settings > Kraken.io.
API Key/Secret
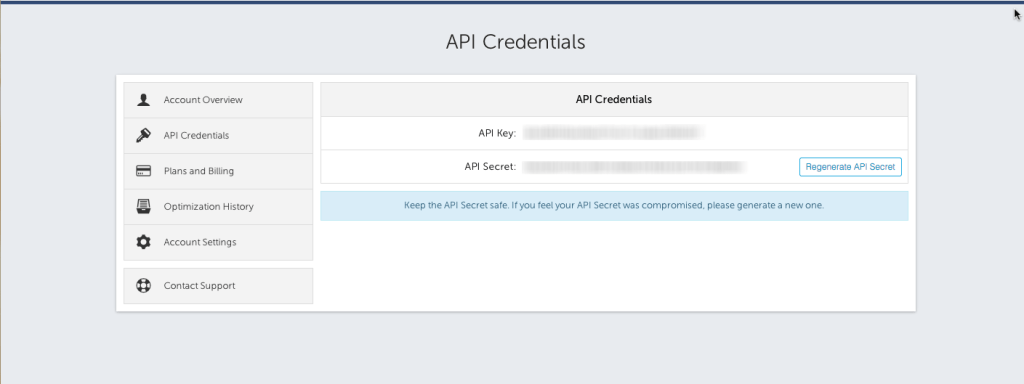
To activate Kraken, you’ll need to insert your API Key/Secret which can be found within the Kraken dashboard. Go to Kraken.io and sign up for their service or log in to your account if you have one. Log in to your dashboard > Select API credentials on the left hand sidebar.
Back in WordPress
Insert your API Key/Secret into the Kraken API fields and hit save. (WordPress Location: Settings > Kraken.io > Kraken API Fields)
Congrats! Kraken is now setup.
Getting started with Kraken
Within the Kraken’s settings tab, you can customize how the plugin functions. You can select to have your images optimized automatically upon upload, select an image parameter limit for optimization, preserve EXIF Metadata which informs the browser of its meta data and copyright information.
This is the best part. If you’re like me, you must have several images inside your media library that need to be optimized. I’ll show you how Kraken can optimize all of your images without breaking a sweat.
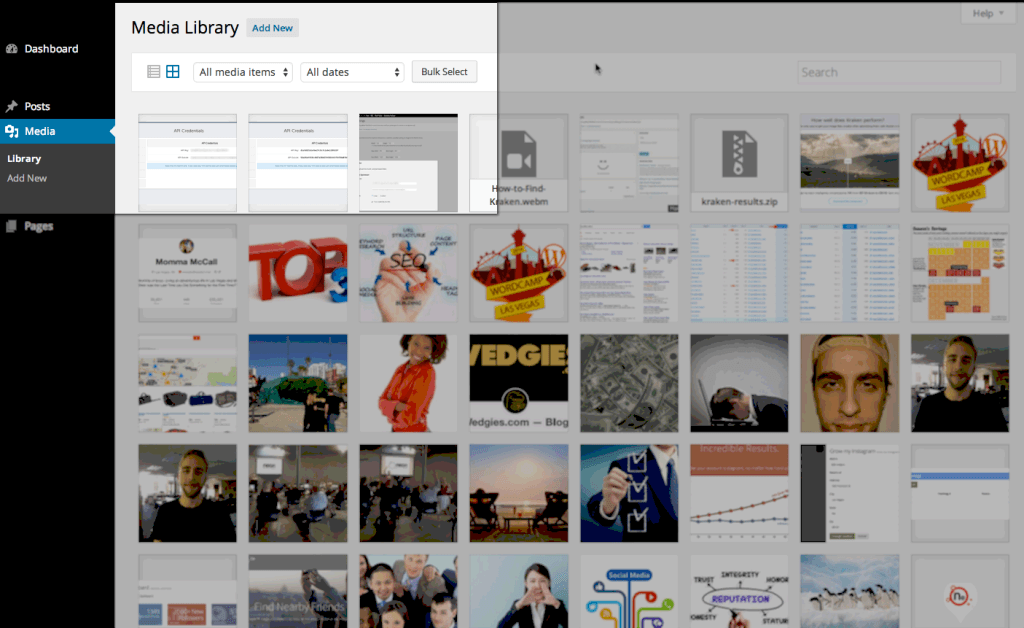
First head over to Media > Library.
Bulk Optimization
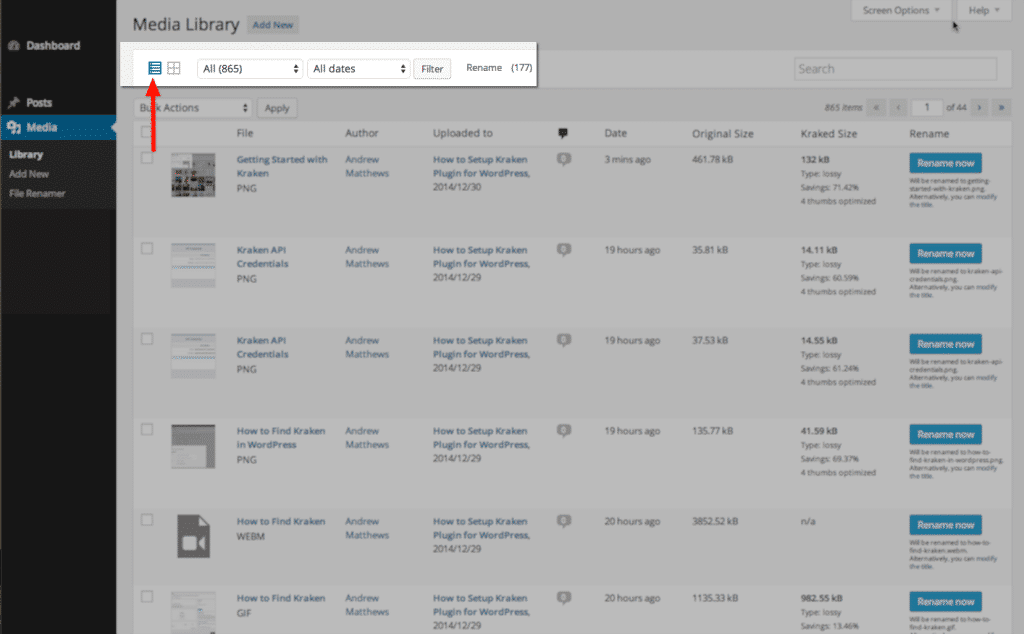
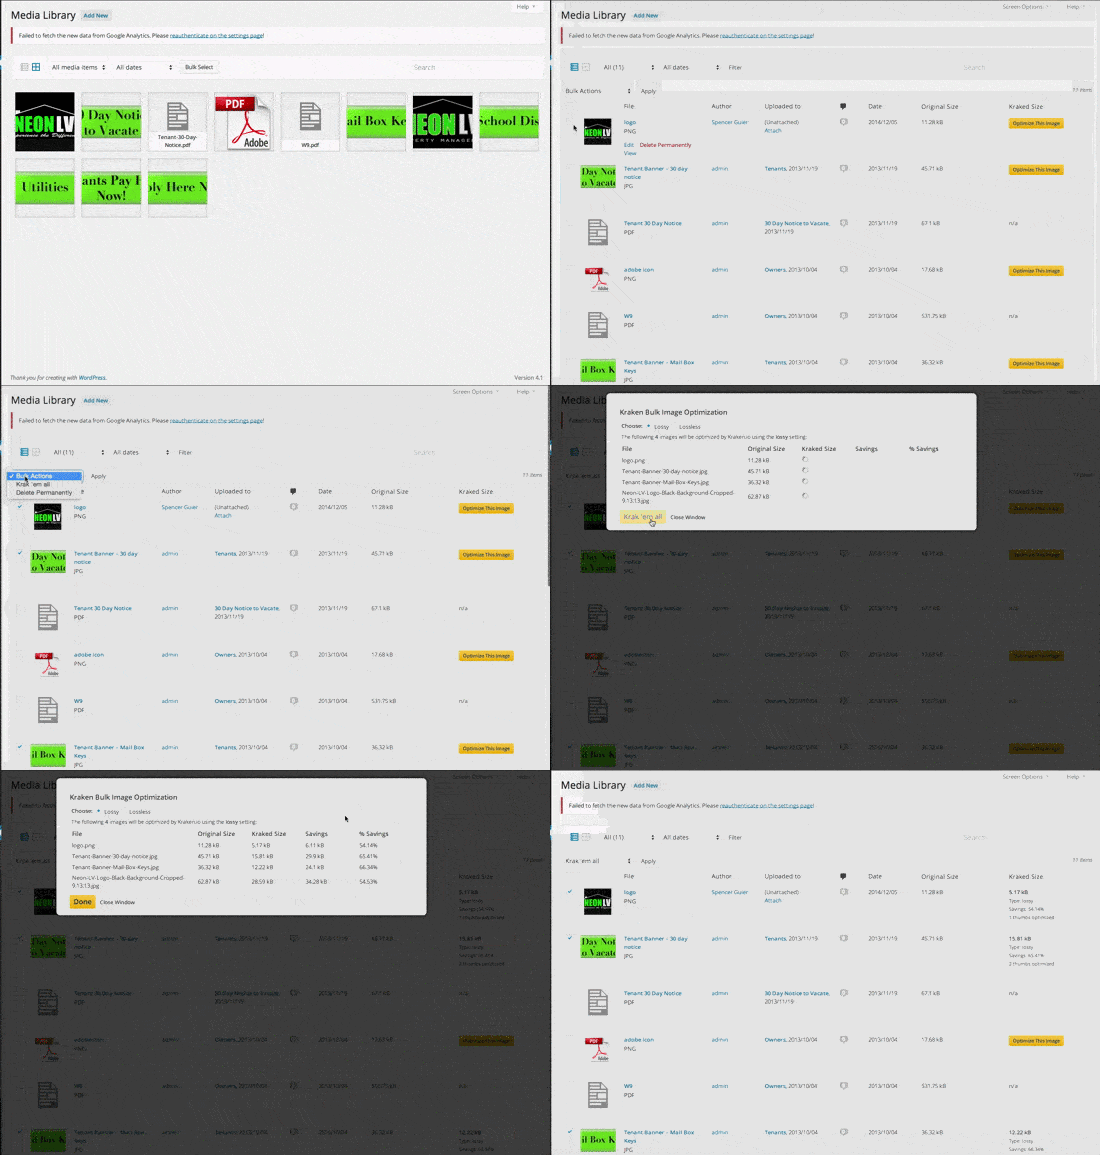
Optimizing images in bulk? Make sure that your media library is set to display as a list (select from list icon). It makes selecting images easier.
Krak’em all
After selecting your images, hover your cursor back to the “Bulk Uploads” button and select “Krak ’em all” option on the drop down.
Here’s what that process looks like.
Single Image Optimization
In the gif above, you’ll notice on the right hand side that there are yellow buttons labeled “Optimize this image.” Simply select an image and hit the button to start the optimizing process.
Lossy vs Lossless


Can you tell the difference? Amazing, right?
The simple answer is this:
- Lossy = Inferior Quality / Lighter File Size
- Lossless = Superior Quality / Heavier File Size
But who can tell the difference anyways?
The Technical Difference
Top
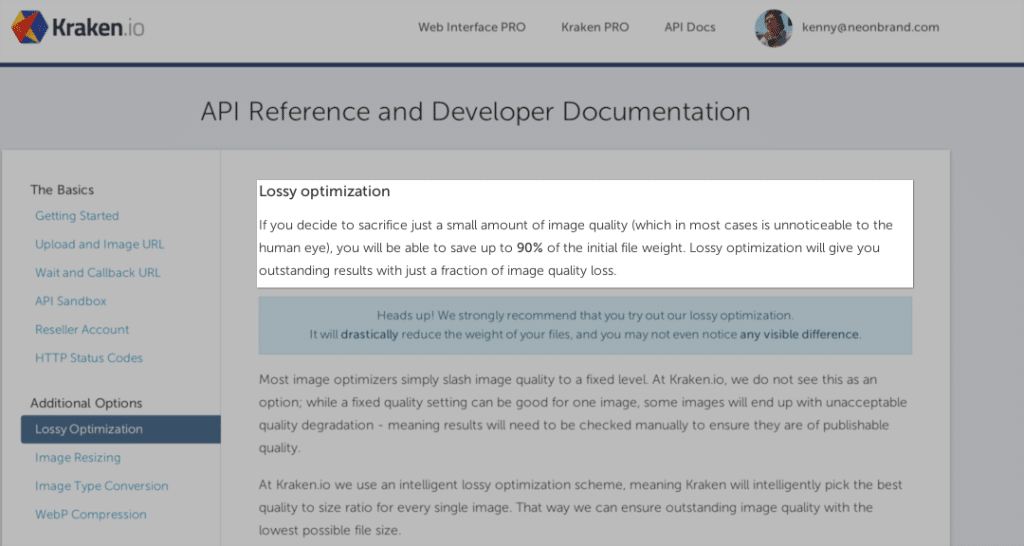
When optimizing images using the Lossy feature, “you sacrifice just a small amount of image quality (which in most cases is unnoticeable to the human eye), you’ll be able to save up to 90% of the initial file weight.”
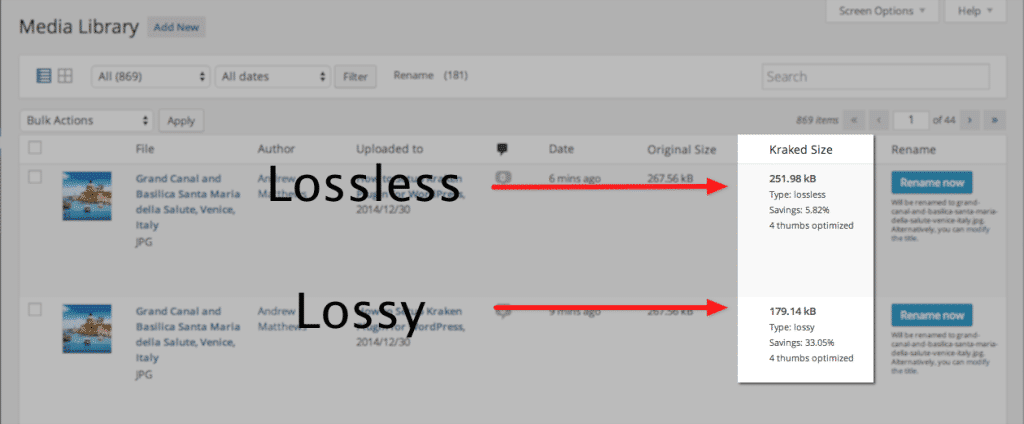
Here’s the breakdown:
Lossy (Left photo)
- Original Size: 267.56.14kb
- Kraked Size: 179.14kb
- Savings: 33.05%
Lossless (Right Photo)
- Original Size: 267.56kb
- Kraked Size: 251.98kb
- Savings: 5.82%
You can find this information inside your Media Library under “Kraked Size.”
The Fundamental Difference
Top
The lossy compressed image results in an image that doesn’t “look” as optimal. If you can afford the extra file size, I’d recommend optimizing using the Lossless feature. Interestingly, it’s nearly impossible to notice the difference between both compressions.
That’s the charm the plugin has to offer to it’s users. I call that “awesomeness.”
Free vs Paid
Free
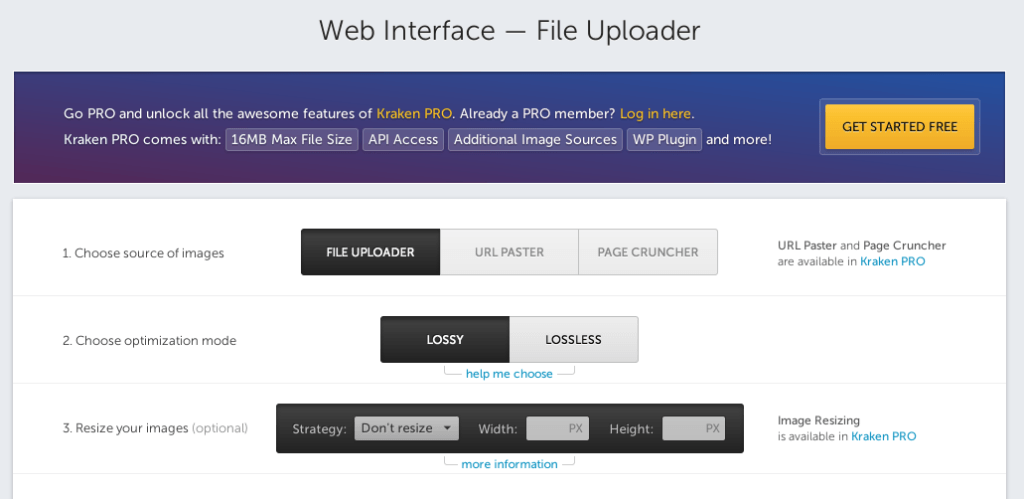
To use Krakens free version, visit their Web Interface platform which offers a test drive of their service.
Pros
- It’s free to use
- Compress Images by up to 90%
Cons
- Optimize images up to 1mb in file size
- No plugin access
Paid
Imagine being able to upload an image that is automatically optimized by Kraken before it appears in your media library? Great User Experience!
Pros
- Plugin Access
- Optimize images up to 16mb in file size
- API access
- Access to Web Interface
Cons
- …………(I’m yet to find one. Still looking.)
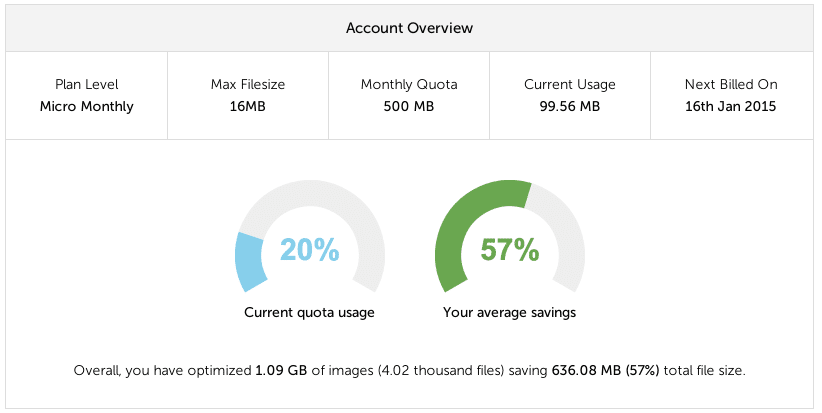
We’re currently using the micro plan which is a good fit for our needs, however we intend on increasing images on our blog posts in the near future and eventually we’ll have to upgrade our plan.
Here’s a breakdown of our plugin usage and plan we’ve subscribed for.
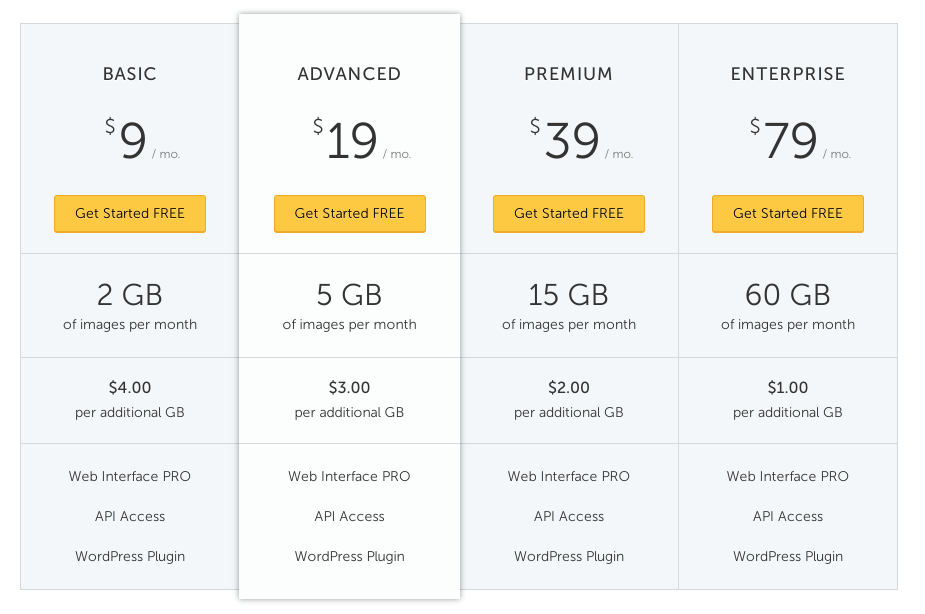
If you’re interested in learning more about their plans, here’s a snapshot of their pricing schedule from April 5th, 2016.
(If you like this article and would like to sign up with Kraken, use our affiliate link to get started)
Concluding Thoughts on Kraken.io Plugin for WordPress
Independently if you’re a Free or Pro user, you can extract a lot of value from optimizing your images with Kraken Web Interface or WordPress Plugin.
We’ve used Kraken enough to know that it:
- Saves Time: Optimizing images was time consuming and not as effective
- Generates Value: Your images still display amazing quality after compression
- Improves Page Load Speed: A competitive website needs to always be improving page load time
